AP Automation Admin Guide
Configuring DocMgt AP Automation is mostly a matter of changing workflow configuration. The workflow is set up to carry all the invoices through the proper steps. You will want to change some properties of the workflow to make the process work the way your given process dictates.
To Get Started
Import the AP Automation configuration using the Config Manager's "Load from Cloud" button. The name of the config is "AP Automation via Machine Learning". Click the config in the list then click the "Select" button. This will import the config into the Config Manager. You can review the items as you wish. When you are ready, click the "Import This Config" button to import the config into your system.
Basic Process Flow
Invoices are saved into an AP-Batches Record. That Record is routed through workflow to be processed. The AP-Batches Record is kept intact with the original incoming document file(s). Workflow then copies the original document(s) to a new AP-Invoices Record and routes it independently of the original Ap-Batches Record. The AP-Batches Record is now done with it processing and the AP-Invoices Record continues on.
The AP-Invoices Record is sent along the following workflow steps/triggers:
- OCR - The OCR trigger sends the document(s) off to have OCR performed using the Perform OCR action. It is configured to OCR using the Invoice Processing OCR mode. This not only performs OCR but also captures the Invoice data from the image(s).
- SPLIT - The invoice documents are then split into individual invoices using the captured invoice data. This is done via the Auto Split Record action by making sure the Split action is set to "Invoice Split Processing". During the split process, all the invoice data captured per page is transferred to Record variables that can be used for indexing the invoice Records at the INDEX step.
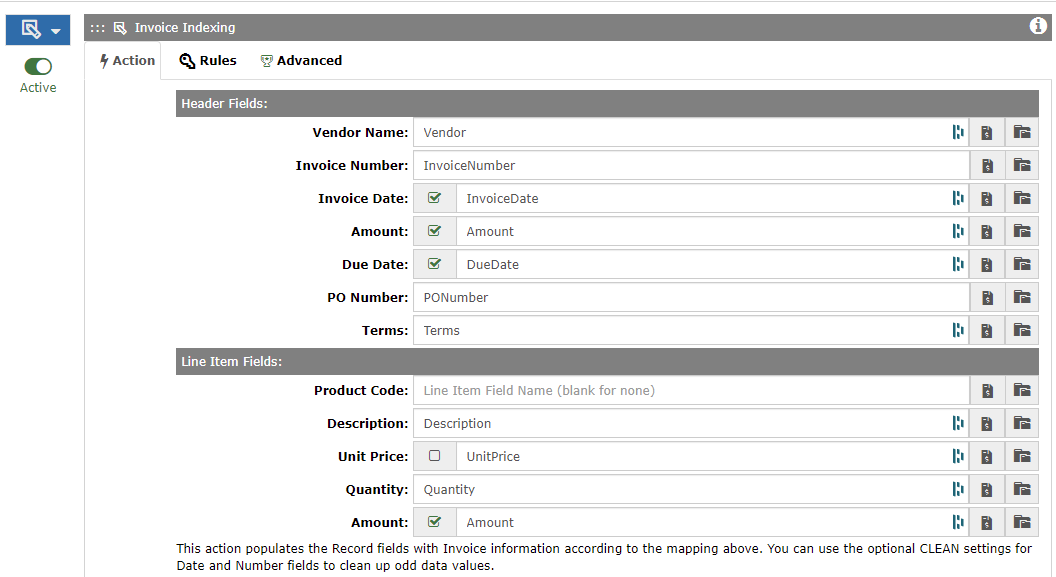
- INDEX - The invoice data that is made available from the SPLIT step is then mapped to the proper Record variables. This is just a Multi-Variable Update action that takes the standard "INVOICE_" fields from the Record and copies them to the fields that were configured for the AP-Invoices record type.
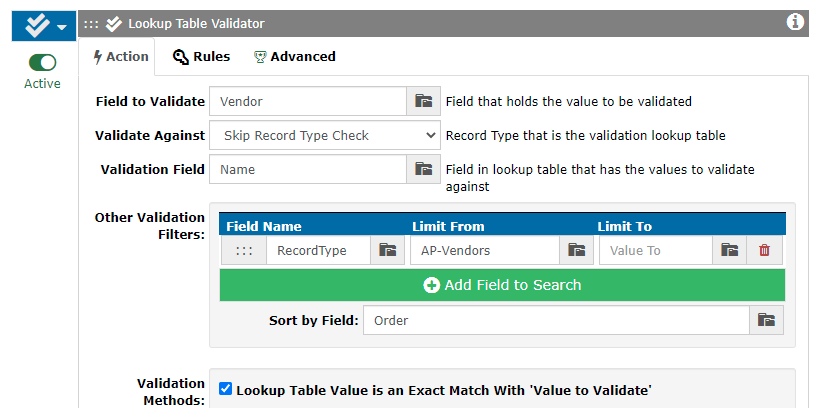
- Vendor Validation - This trigger uses the Lookup Table Validator action. The vendor names captured are compared to the AP-Vendors records to look for a name match. If found, the Vendor ID is updated to the ID from the AP-Vendors Record that was matched.
- Advanced Vendor Validation - This is a more complete vendor match process and is only activated if the Vendor ID is not found previously. This trigger uses the Lookup Table Reverse Validator action. Specify the fields in the AP-Vendors Records to use for searching the invoice OCR data. When certain values in the AP-Vendors Record are found in the invoice then that makes a vendor match. If found, the Vendor ID and Name are updated to the ID and Name from the AP-Vendors Record that was matched.
- Invoice Review - This is where the users will first interact with the invoices after they are scanned in. This brings up the indexing screen so they can review, update, approve, etc. When they complete the invoice then we do another vendor match and if the vendor is not found in the AP-Vendors record type then we add a new AP-Vendors Record so the next time an invoice comes in from that vendor it will match.
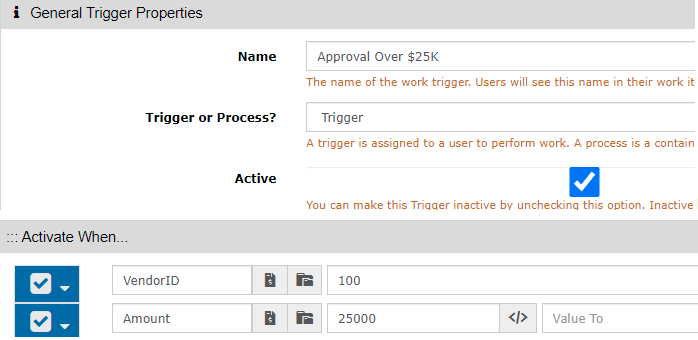
- Custom Approval Steps - These steps are not implemented as part of the standard configuration. This is the part of the workflow where approvals would normally come in. Add as many as necessary for your process.
- Export to Accounting System - This is where the data would go after all review and approvals are done. This could be replaced with a QuickBooks integration or a custom export routine depending on your needs.
To Do List
When you implement the AP Automation workflow there are the things you should review and/or change. This list assumes you are starting with the standard AP Automation configuration. This list is also not exhaustive. There are surely other changes that will need to be made for production based on your particular scenario.
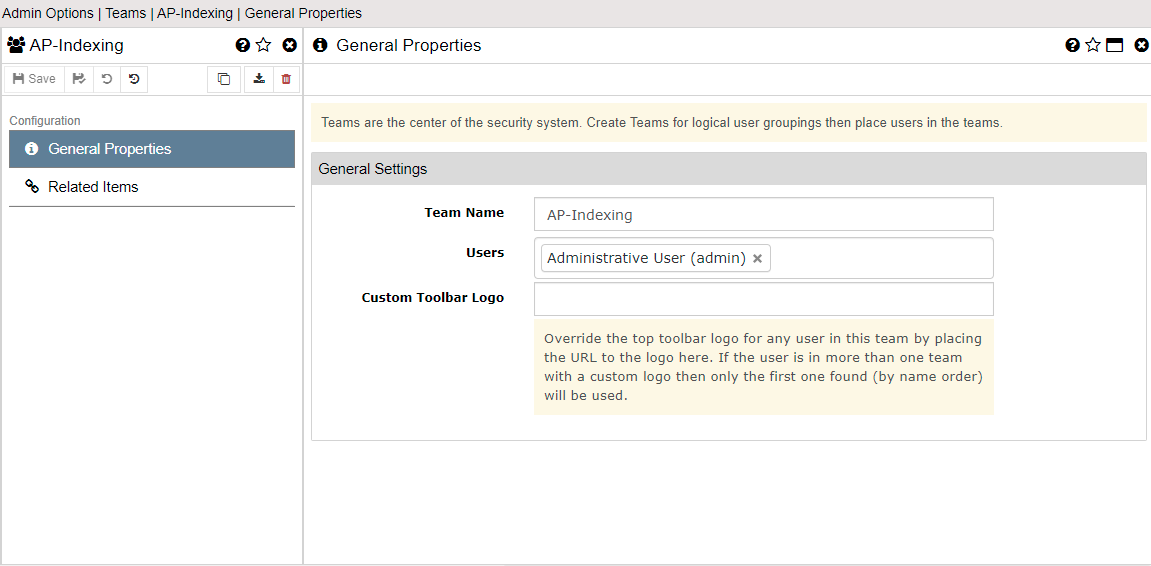
- Add users to the "AP-Indexing" team. The team comes with the configuration. You just need to make sure you add users to it so the Invoice Review step has users to which to assign invoices.
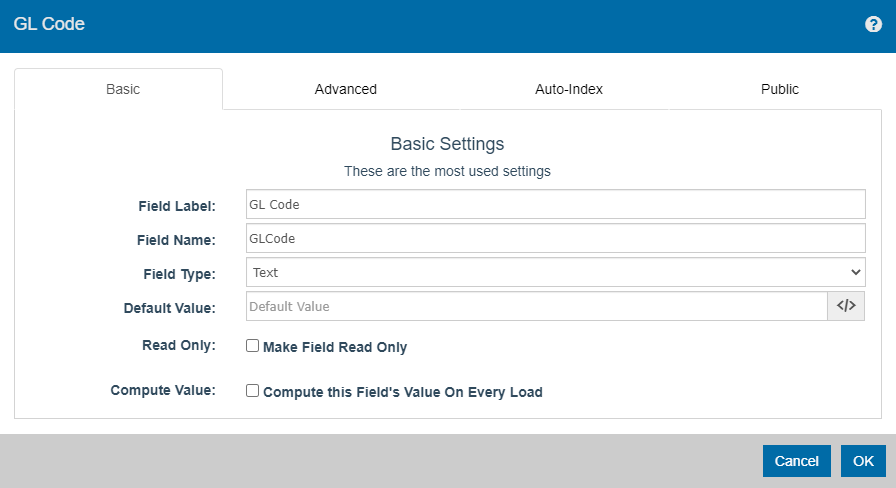
- Update the "AP-Invoices" record type to set it the way it makes sense for your users. For instance, you may need to add line-item fields for line item indexing. Or you may need to add a GL Code field for GL assignment. It is easiest to not change the field names that are there but if you have to you can. If you do then make sure to update the
- Update the "Index Invoice" trigger's Assignment Actions to set the proper fields based on any changes you made to the "AP-Invoices" record type.
- Import your vendor list into "AP-Vendors". You can add more fields if you like but if you change field names you will need to account for those in other places.

- Update the "Vendor Validation" (assignment actions), "Advanced Vendor Validation" (assignment actions) and "Invoice Review" (button actions) triggers to account for any changes in you made to the "AP-Vendors" fields.
- Add approval steps directly after the "Invoice Review" trigger as needed.
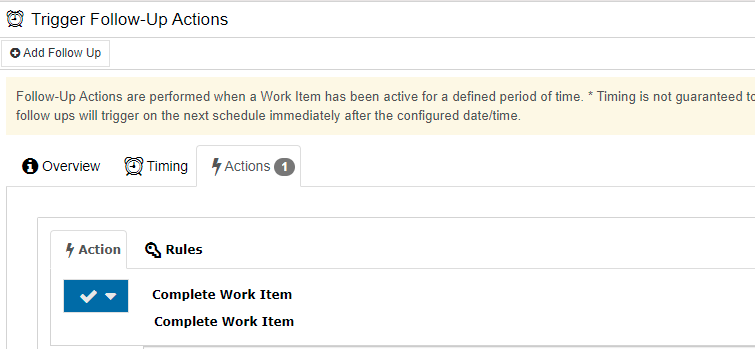
- Remove the Follow-Up action from the "Export to Accounting System" trigger. This Follow Up action is only for demo purposes.
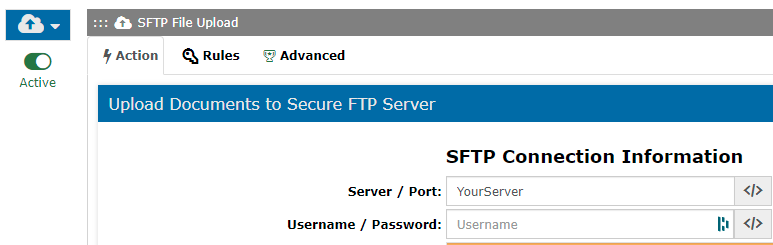
- Update the "Export to Accounting System" trigger however you need. Maybe you just assign it to an Exporter user for a custom export. Or maybe you send the invoices to your SFTP server for processing. Or maybe you delete it completely and replace it with a QBO integration. The options are almost unlimited.
Available Field Values within the AP Automation Process
The following fields are available for indexing after the SPLIT process. In order to have access to these variables you need to have used the OCR and SPLIT actions using their Invoice Processing options. Note that if any of these field values are empty that means the value was not found on the given invoice.
Master Field Values
These fields have been curated from the detail field values below. These are the logical "best" options for the main invoice data. You can always extend the master field values with the detail field values as needed.
- Invoice_Master_Vendor
- Invoice_Master_VendorAddress
- Invoice_Master_VendorAddressFirst
- Invoice_Master_InvoiceNumber
- Invoice_Master_InvoiceDate
- Invoice_Master_Amount
- Invoice_Master_DueDate
- Invoice_Master_PONumber
Detail Field Values
These are all the fields that are available for indexing. We have used the most likely ones as the "master" field values but all field values are available to you.
- Invoice_AmountDue
- Invoice_BillingAddress
- Invoice_BillingAddressRecipient
- Invoice_CustomerAddress
- Invoice_CustomerAddressRecipient
- Invoice_CustomerId
- Invoice_CustomerName
- Invoice_DueDate
- Invoice_InvoiceDate
- Invoice_InvoiceId
- Invoice_InvoiceTotal
- Invoice_PreviousUnpaidBalance
- Invoice_PurchaseOrder
- Invoice_RemittanceAddress
- Invoice_RemittanceAddressRecipient
- Invoice_ServiceAddress
- Invoice_ServiceAddressRecipient
- Invoice_ServiceEndDate
- Invoice_ServiceStartDate
- Invoice_ShippingAddress
- Invoice_ShippingAddressRecipient
- Invoice_SubTotal
- Invoice_TotalTax
- Invoice_VendorAddress
- Invoice_VendorAddressRecipient
- Invoice_VendorName