AP Automation User Guide
Using DocMgt AP Automation really comes down to uploading or scanning your invoices and then reviewing the invoices when they are processed. The key to making the system work properly is to place the invoices into AP-Batches and then route them down workflow to be processed.
Uploading Documents
To upload documents, you have a few options. For instance, if you have a PDF invoice that was emailed you could drag and drop that from Outlook directly to AP-Batches for processing. Or if you have a document saved to your desktop you can drag and drop that into the system. You can also use the Entry / Upload Documents toolbar option to browse for a document to upload into AP-Batches.
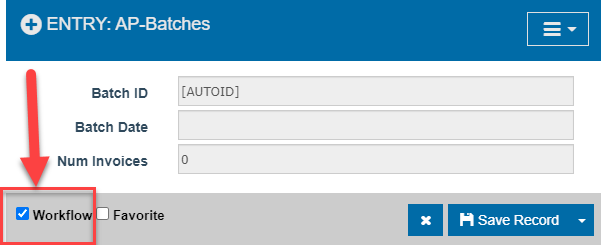
No matter how you upload the documents, make sure to turn ON the Workflow button before you save.
Scanning Documents
You can scan invoices into the system using a copier if it has been configured correctly. If you are setting up your copier, make sure you configure the button to use SFTP to send the documents directly to your site. Here is an article that explains how the SFTP works and how to set it up. Once the invoices are scanned and uploaded via the copier the process automatically begins.
Reviewing the Results
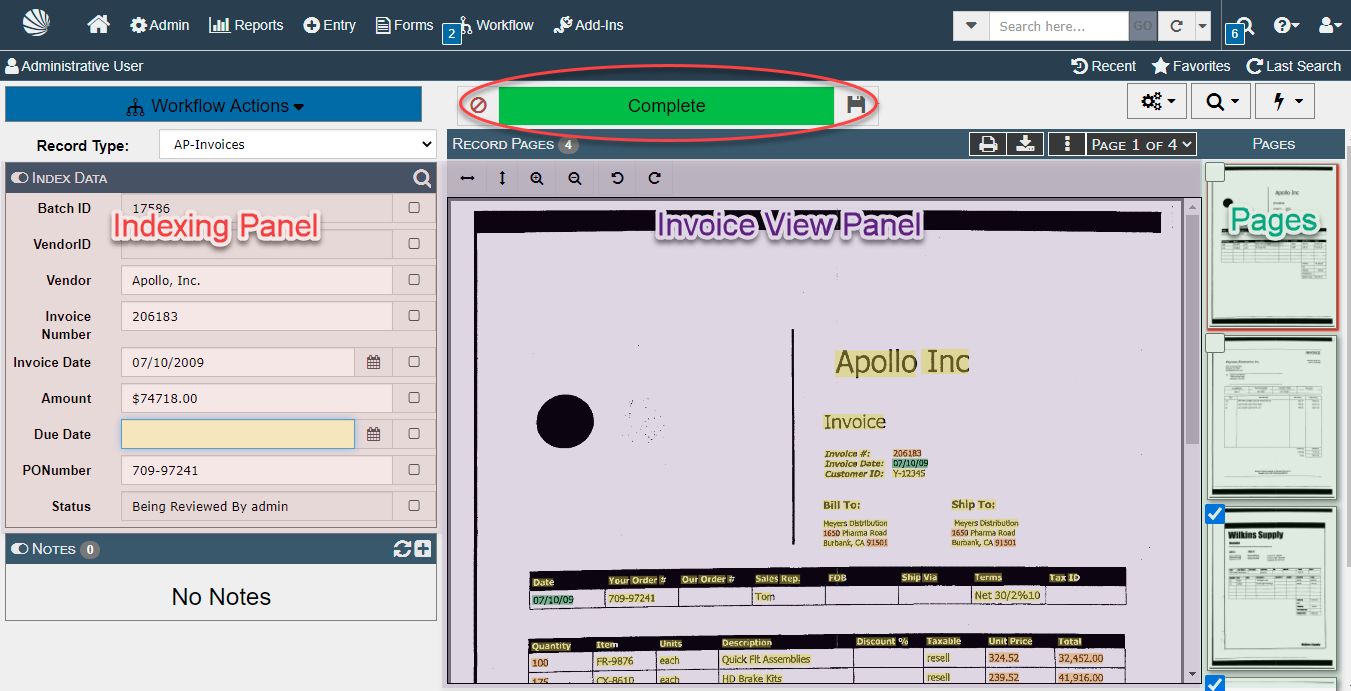
Once the AP Automation has done its work and has completed the invoices, the workflow will send the invoices to you for review. The invoice review and indexing screen will come up when you open the invoice for review. You can use this screen to make any adjustments needed before completing the invoices. When you are done with this invoice you simply click the big green COMPLETE button at the top of the screen.
Functions Available in the Review Screen
Apply GL Codes
The most basic thing you will do in this screen is to apply any GL Coding required for your accounting system. This can be done at the invoice level or on a per line-item basis. This is a configuration that needs to be configured to match your particular needs. If you do not need to apply GL codes let your configuration team know and they will adjust your system accordingly.
Changing the Invoice Information
The other basic thing you can do in this screen is to change the information about the invoice itself. You can make any adjustments for your needs or for correcting anything that might not be 100% accurate. You can either type in the information or you can click on or draw a box around the words you want to use for indexing. To do this, click on the field in the left-hand side of the screen that you wish to change. Then click on the value (or draw a box around it) in the image of the invoice. Whatever you clicked on or drew a box around will be placed into your field.
Splitting Invoices
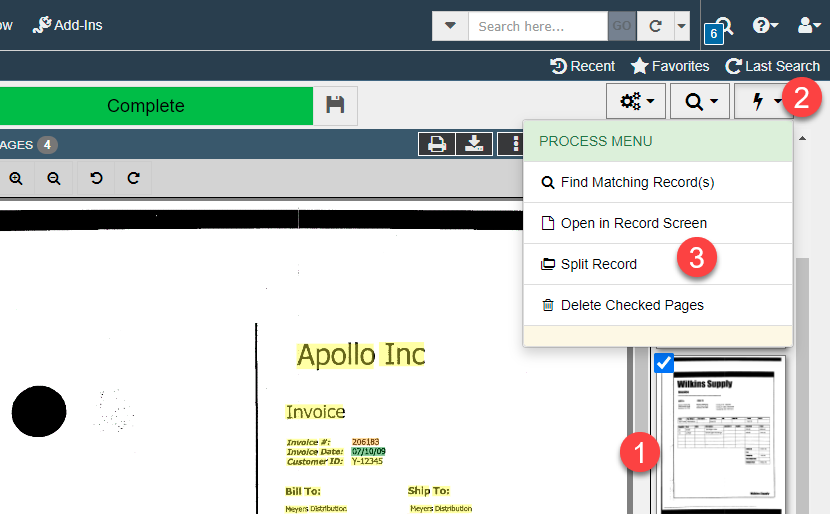
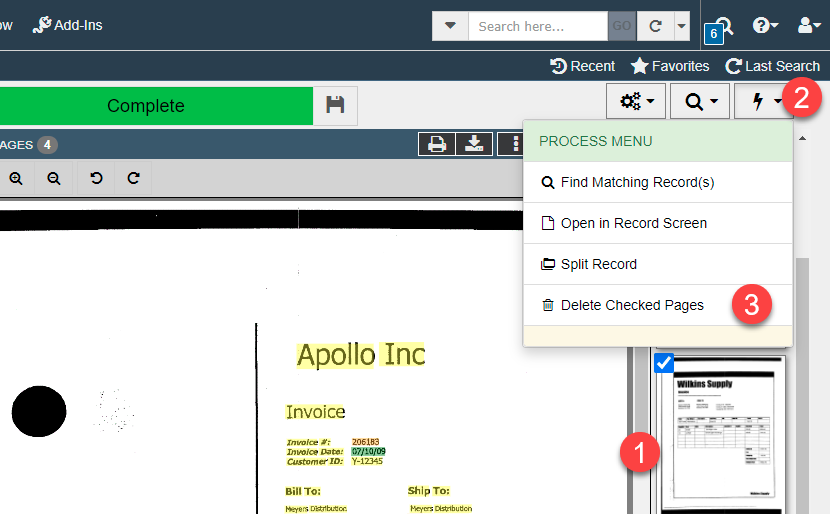
Sometimes 2 invoices get sent in together and need to be separated. This is called "splitting" the invoices. To do this, check the pages in the Pages list that need to split to another invoice. Then click the lightning bolt button at the top of the screen and select "Split Record". This will move the checked pages out of this invoice and make a new invoice record. The new invoice will be routed to be reviewed and indexed separately.
Merging Invoices
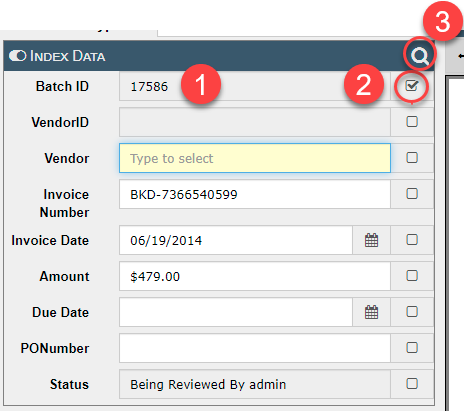
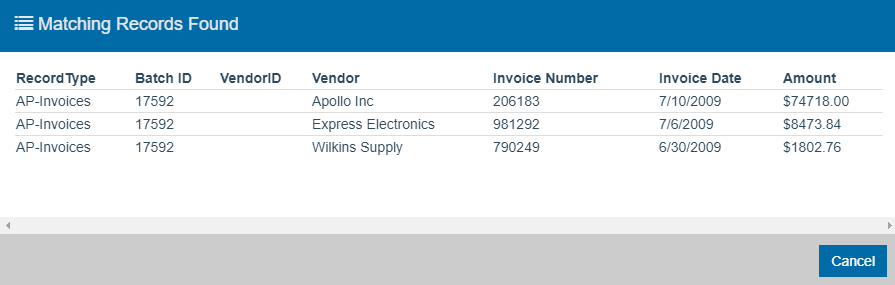
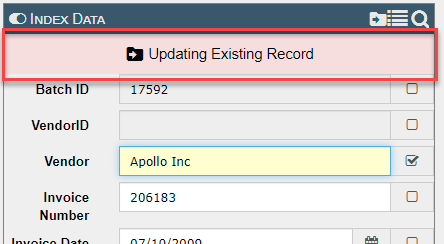
Another thing that happens is an invoice gets split when it should have stayed together. If you find an invoice that was accidentally split you can use the Indexing Panel to merge it back together. You can use the searching function in the Indexing Panel to find the other invoice. Check ON the fields you wish to search by as shown below. Then click the Search button. This will bring up a list of invoices that match your search. Click the invoice you wish to add the current pages into. Make sure the red panel at the top of the indexing panel says "Update Existing Record". If not click the red panel to change it. When you Complete this invoice, the invoices will merge together. These steps are shown in the series of pictures below.
Deleting Pages
If you have invalid pages or pages that are blank in your images you can get rid of them. Simply check the pages that you want to delete. Then click the lightning bolt button at the top of the screen and select "Delete Checked Pages". This will rebuild the invoice by removing the selected pages.
Advanced Tip
To easily check pages on and off use the CTRL key and click anywhere on the page thumbnail. This will toggle the check box on and off for that page.