Main Options
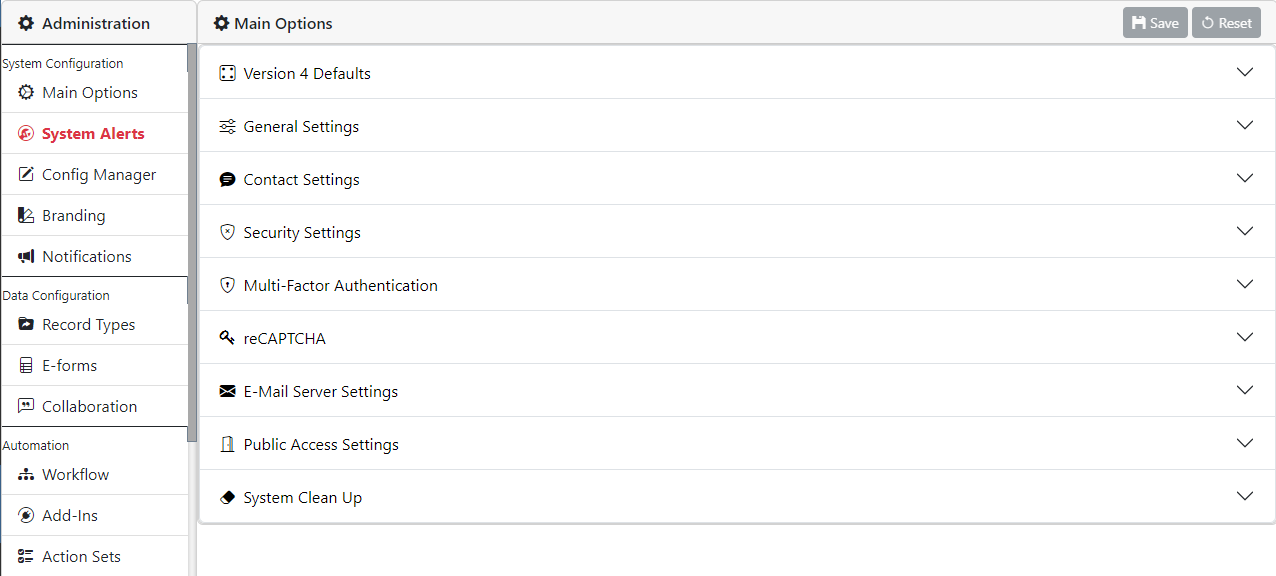
Version 4 Defaults
Use this section to redirect users from version 3 to version 4. This section will be removed once V3 is no longer supported.
General Settings
Raw Data Entry
If you wish to allow users to add their records based on no Record Type then you will want this checked on. Without this the entry drop down will not have an option for Raw Data Entry.
Single View
In cases where a user only has access to one Record Type you may want their searches limited to that Record Type even when using Global search. The benefit of doing this is that the search results will be in the defined format and the number per page can be defaulted, etc.
Asset Tracking
If you wish to provide support for tracking assets in DocMgt you can turn on the Assets check box. This will add the Asset top toolbar option as well as the asset section to the Record view screen.
Asset Workflow
If you have Asset Tracking turned on and have Workflow licensed you can use them together. Whenever an Asset is requested, that Record is routed. Whenever a request is canceled, the routed item is canceled as well (if still available). This allows you to provide more logic during the request and fulfillment processes such as notifications, record updates and more.
Base Server URL
This is the URL that users will use to access the server. There may be times where you have multiple URLs used to access a server. Be sure this setting is set to the URL most frequently used.
Server Time Zone
Specify the time zone most of the users are in. This will default the [DATE] and [TIME], etc. variables to that time zone.
Contact Settings
Support Name
This is the name you wish to show the users. It could be John Doe or maybe Support Department or even be ACME Support Co. Put in the name of the person or group that handles your support calls. If you leave this empty then the word "support" will show up in its place.
Support Phone
This is the phone number where the support person/group can be contacted. If you leave this blank then a phone number is not shown.
Support Email
This is the email address where the support person/group can be contacted. If you leave this blank then an email address is not shown.
Support Site Name
This is the Name of the web site you wish to have users go to for support. If you leave this blank then the web site link is not shown.
Support Site URL
This is the URL of the web site you wish to have users go to for support. If you leave this blank then the web site link is not shown.
Security Settings
Base Security
By default, each user will have a certain level of access to the system before they are given specific security rights. You can change their default level of access by changing this setting to Read/Write, Read Only or No Access.
Read/Write will give them the ability to read (view) and write (change) information in the system unless another security setting prevents them from doing so. This setting is very useful if most the users in the system will be reading and writing most of the data.
Read Only will give them the ability to read (view) all the information in the system unless another security setting prevents them from doing so. You can add more security settings later to give them the ability to write (change) certain information but for most information they will only be allowed to read. This is useful if the system is such where most of the information is OK for most users to view but you only want a smaller portion of users to change the information.
No Access will hide all information from them unless you specifically give them rights to certain types of information later. This is useful if most of the information is sensitive or if there are many groups of users and many types of information in the system.
Inactivity Logout Minutes
If you wish to have the users automatically logged out after a set number of minutes they are inactive, set the number of minutes in this field. Set to 0 to ignore this option. Once the user has been inactive for the specified number of minutes they will be logged out. Inactivity is defined as not mouse or keyboard activity in the application itself.
Password Change Frequency
This is used to specify wow often (in days) to force users to change their passwords. Leave it blank or set to 0 to not force password changes. Otherwise when a user logs in after their password expiration they will be prompted to change their password.
Password Security Level
You can set this option to the level of password protection you need. The options are Low, Medium and High.
Low - No specific password requirements
Medium - Minimum password length of 6 characters
High - Minimum of 6 characters, one or more must be upper case, one or more must be lower case, and one or more must be non-alphanumeric
Custom - You can specify a custom REGEX expression that dictates the complexity required
Password Security REGEX
Set your custom REGEX expression here for password complexity
Failed Login Emails
If the user tried to select a new password that does not meet requirements this message is shown. Leave blank for a default message.
Remote Support
Turning this option ON allows your support representatives to log in remotely using a temporary account. These temporary accounts are created as needed and are set to automatically expire at the end of the day. This is much more secure than having a shared account for report support.
Allow Password Reset
Turning this option ON allows users to click a Forgot Password link on the login page to start the password recovery process. Turn it OFF if you do not wish to use that feature.
Allow 'Remember Me'
Turning this option ON allows users to check the 'Remember Me' box in the login page. By checking that box during login, the user will be automatically logged in when visiting the site again. This is done with persistent cookies so please review all security concerns around using encrypted cookies with SSL communications before using this.
Personal Signatures
Allow users to set their personal signatures. These will be available via the annotation stamps and the signature pads from workflow, add-in or e-form signature prompts.
Public PDF Forms
DocMgt has the capability to accept external PDF forms as posts into the system. For security this is not enabled by default. If you wish to use PDF forms to post data and documents into the system turn this on.
SFTP Access (Cloud only)
IF you wish to allow users to upload documents via SFTP you will want to turn on this setting.
Add-In Downloads
Turn this on to allow Add-Ins to download files to local computers and run applications
Multi-Factor Authentication
Enable Multi-Factor Authentication
When ON users will be prompted to enter a code to complete the login process. The code is emailed to the email address on file or a text is sent to the SMS number on file. If the user has both Email and SMS then the login screen prompts them as to which type to use for sending the authorization code.
MFA Authentication Timeout
The number of days until the MFA times out for each user. After that number of days has past the user will be forced to re-authenticate using MFA once again.
reCaptcha
reCAPTCHA Site Key / Secret Key
** This section is not applicable to the Cloud version of DocMgt
If you wish to you reCAPTCHA with your E-Forms you will need to enter your Site Key and Secret Key here. The system will then be able to validate users using the reCAPTCHA system from Google. Here is a link to the reCAPTCHA site for more information.
Heartland Credit Cards Public Key / Private Key
If you wish to you allow for Credit Card processing via the E-Forms system then you will need to set up an account for each customer with Heartland. Read more about that here - Heartland Web Site. As part of the sign up process you will get a public and private key. Place them in these fields then your CC processing will be active.
CAUTION! You will receive 2 sets of keys - one for TESTING and one for PRODUCTION. Be sure you use the TESTING keys during testing then update to your PRODUCITON keys once you are ready to go live.
Document Storage
** This section is not applicable and not available to the Cloud version of DocMgt
Document Storage
This is the full path to the base folder of your document storage location. Set this once then do not change it unless you are actually moving your storage location.
WARNING!! CHANGING THIS SETTING AFTER DOCUMENTS ARE ALREADY STORED IN THE SYSTEM WILL NOT MOVE THEM TO THE NEW LOCATION!! YOU MUST MANUALLY MIGRATE THE DOCUMENTS WHEN YOU CHANGE THIS SETTING!!
Email Server Settings
Default 'From' Address
The email address to which outgoing emails default. Some areas of the system will set the FROM address to the user sending the emails. However, for automated emails (workflow alerts, etc.) this default FROM address will be used.
Default Reply To Address
This sets the Reply To address that is used so when users reply to emails, that email address is where the emails go.
Email Server
This is the full address of the SMTP server the system will use to relay emails. This can be a DNS name or IP address.
* This setting should be left empty for cloud / hosted versions of DocMgt unless you wish to your own SMTP server
Server Port
The port number that the SMTP server is listening on. For non-secured servers, port 25 is normally used.
* This setting should be left empty for cloud / hosted versions of DocMgt unless you wish to your own SMTP server
SSL Required
If your server requires secure connections, check this on.
* This setting should be left empty for cloud / hosted versions of DocMgt unless you wish to your own SMTP server
User Name
The user name (if any) that is used to authenticate with the SMTP server to send the emails.
* This setting should be left empty for cloud / hosted versions of DocMgt unless you wish to your own SMTP server
Password
The password (if any) that is used to authenticate with the SMTP server to send the emails.
* This setting should be left empty for cloud / hosted versions of DocMgt unless you wish to your own SMTP server
When you get your SMTP information filled in you can click the "Send Test Email" button to send a test mail. If there is an error sending you will be shown an error message. If the email sends you will want to be sure to check your inbox to make sure you get the email. The email will be sent to the email address you have on file for your user so be sure your user account is set up with a valid email address before using this function.
Common Examples
GMail
Address: smtp.gmail.com
Port: 587
Secure: yes
Login Name: Gmail user name
Password: Gmail password
office365.com
Address: smtp.office365.com
Port: 587
Secure: yes
Login Name: Office 365 user name
Password: Office 365 password
outlook.com
Address: smtp-mail.outlook.com
Port: 587
Secure: yes
Login Name: Outlook user name
Password: Outlook password
Yahoo Mail
Address: smtp.mail.yahoo.com
Port: 587
Secure: yes
Login Name: Yahoo user name
Password: Yahoo password
Please note that the settings above may change and are out of our control.
* If you choose to use your own SMTP server with the cloud version then you accept the additional administration that goes along with that.
Advanced Administrative Users Only!
This advanced option for SMTP email can speed up email processing on your server but it takes some work on the server side to make this work properly. You can add an entry into the web.config file in IIS that saves all outgoing emails into a folder instead of sending them right away. This will increase the throughput of the system if it has heavy email functionality which can happen if you have a lot of Work Triggers or a lot of Asset Tracking happening.
- Add the following to your web.config in the "configuration" section.
<system.net>
<mailSettings>
<smtp deliveryMethod="SpecifiedPickupDirectory">
<specifiedPickupDirectory pickupDirectoryLocation="YOUR PATH HERE!"/>
</smtp>
</mailSettings>
</system.net>
* Change the pickupDirectoryLocation to a path you have set up for dropping the emails.
- Install an email server with capabilities of processing the drop folder. Here are some examples:
- Microsoft SMPT Server - Read 3rd party setup instructions here
- Exchange Server - TechNet article on configuring Exchange Server to pick up emails
- EmailRelay - http://emailrelay.sourceforge.net/
Public Access Settings
Default E-Form/Portal Banner
Use this to set the default banner graphic for e-forms and collaboration portals. If you leave this blank then the default DocMgt logo will be used for the default e-form image. If blank, collaboration portals will have no banner image placed on them.
Public Header
If the server has more than one record type set for Public Access then you can use this to specify the header that shows up for the Record Type selection screen.
Public Footer
If the server has more than one record type set for Public Access then you can use this to specify the footer that shows up for the Record Type selection screen.
System Clean Up
** This section is not applicable and not available to the Cloud version of DocMgt
This section allows you to decide how long to keep logging information. The trade off here is that more logs means more space is used. For cloud sites this means potentially moving to the next storage tier if too much space is used. For premise or in-house systems, this means more space used in your SQL server which could also drive you to move to another tier of SQL server if too much space is used (mainly for SQL Express users).
Audit Logs
How many months to keep Audit Logs. The system logs virtually every single time any data changes. Because of this the Audit table can get very large. Setting this to 3 months can help safe space. However, doing that also means you will have less audit history so choose this option wisely.
Login Logs
How many months to keep Login Logs. The system logs every log in to the system. This does not take as much space as the Audit data but it can still impact storage. Changing this setting to a lower value means you will have less login history so choose this option wisely.