Conversions
Conversions Report (FileBound Conversion)
The Conversions report is where you migrate content from a FileBound system into DocMgt and monitor the progress of those migrations. Each row in the report is one conversion job. You can start new conversions, watch running ones update live, stop or reprocess a job, and open the log for any completed job. Reach it from the Reports area by choosing Conversions.
What a conversion does
A conversion connects to a FileBound server, reads the projects (or the users and groups) you select, and recreates that content inside DocMgt. Depending on the type you choose it will bring across projects and their fields as Record Types, the FileBound documents as DocMgt documents, e-forms, annotations and record links. Because a job can move a large amount of data it runs in the background on the server, and the report updates itself automatically so you can see records and documents being converted as they happen.
Starting a new conversion
Click New Conversion at the top of the report to open the conversion dialog. The dialog is organized into four tabs, and a tab shows an asterisk (*) while it is still missing required information. The Start Conversion button stays disabled until every required tab is complete.
DocMgt Credentials
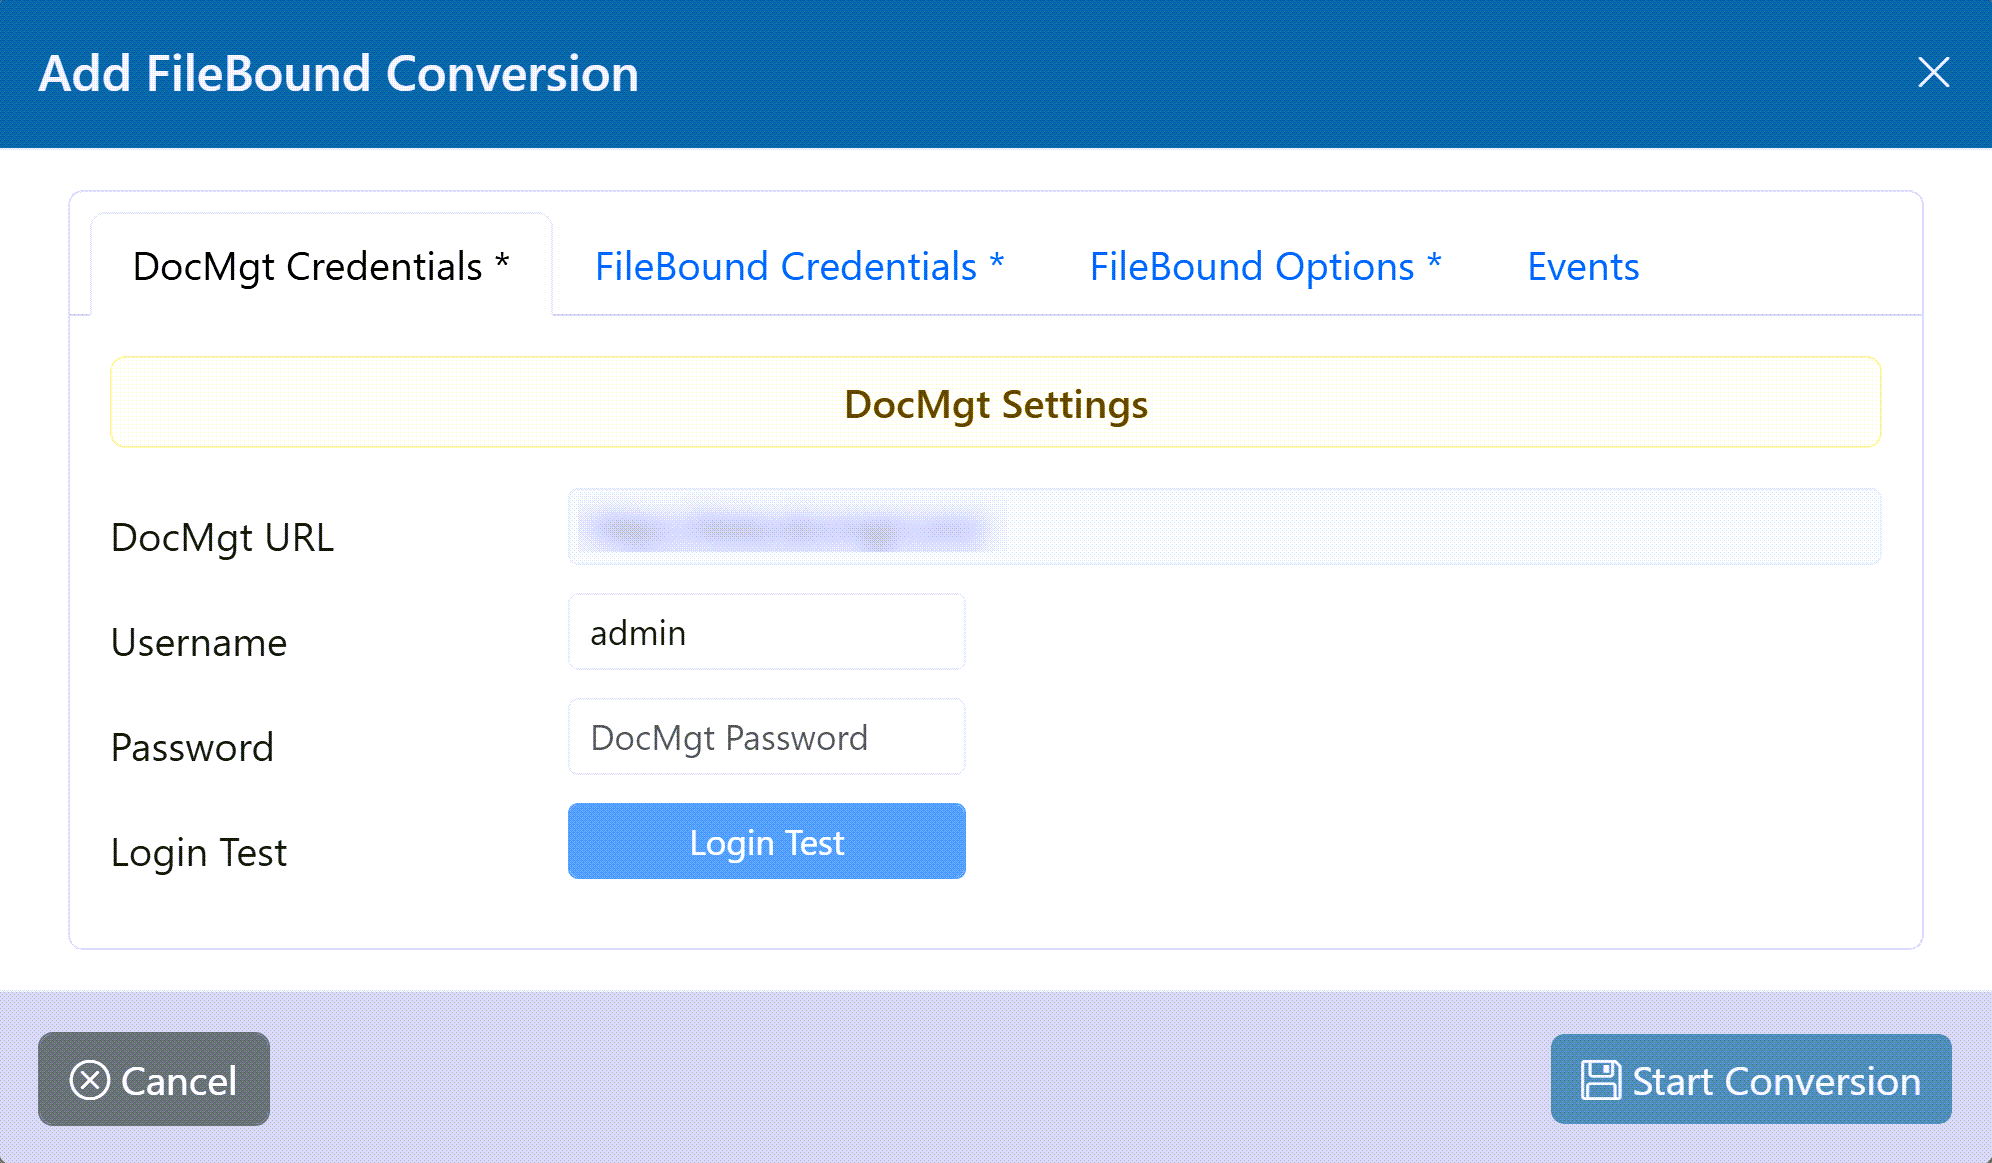
This is the DocMgt system the content will be written into. The URL is filled in for you with the current server and cannot be changed. Enter the Username and Password of the DocMgt account that will own the converted content, then use Login Test to confirm the credentials work before continuing.
FileBound Credentials
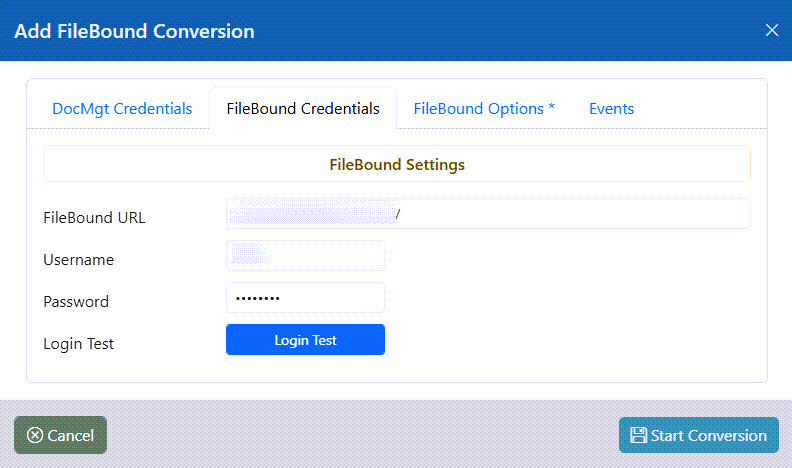
Enter the FileBound URL (it must begin with http or https), plus the Username and Password of the FileBound account to read from. Use Login Test to confirm DocMgt can reach and sign in to FileBound. These credentials are also what the Options tab uses to load the list of available projects, so complete this tab first.
FileBound Options
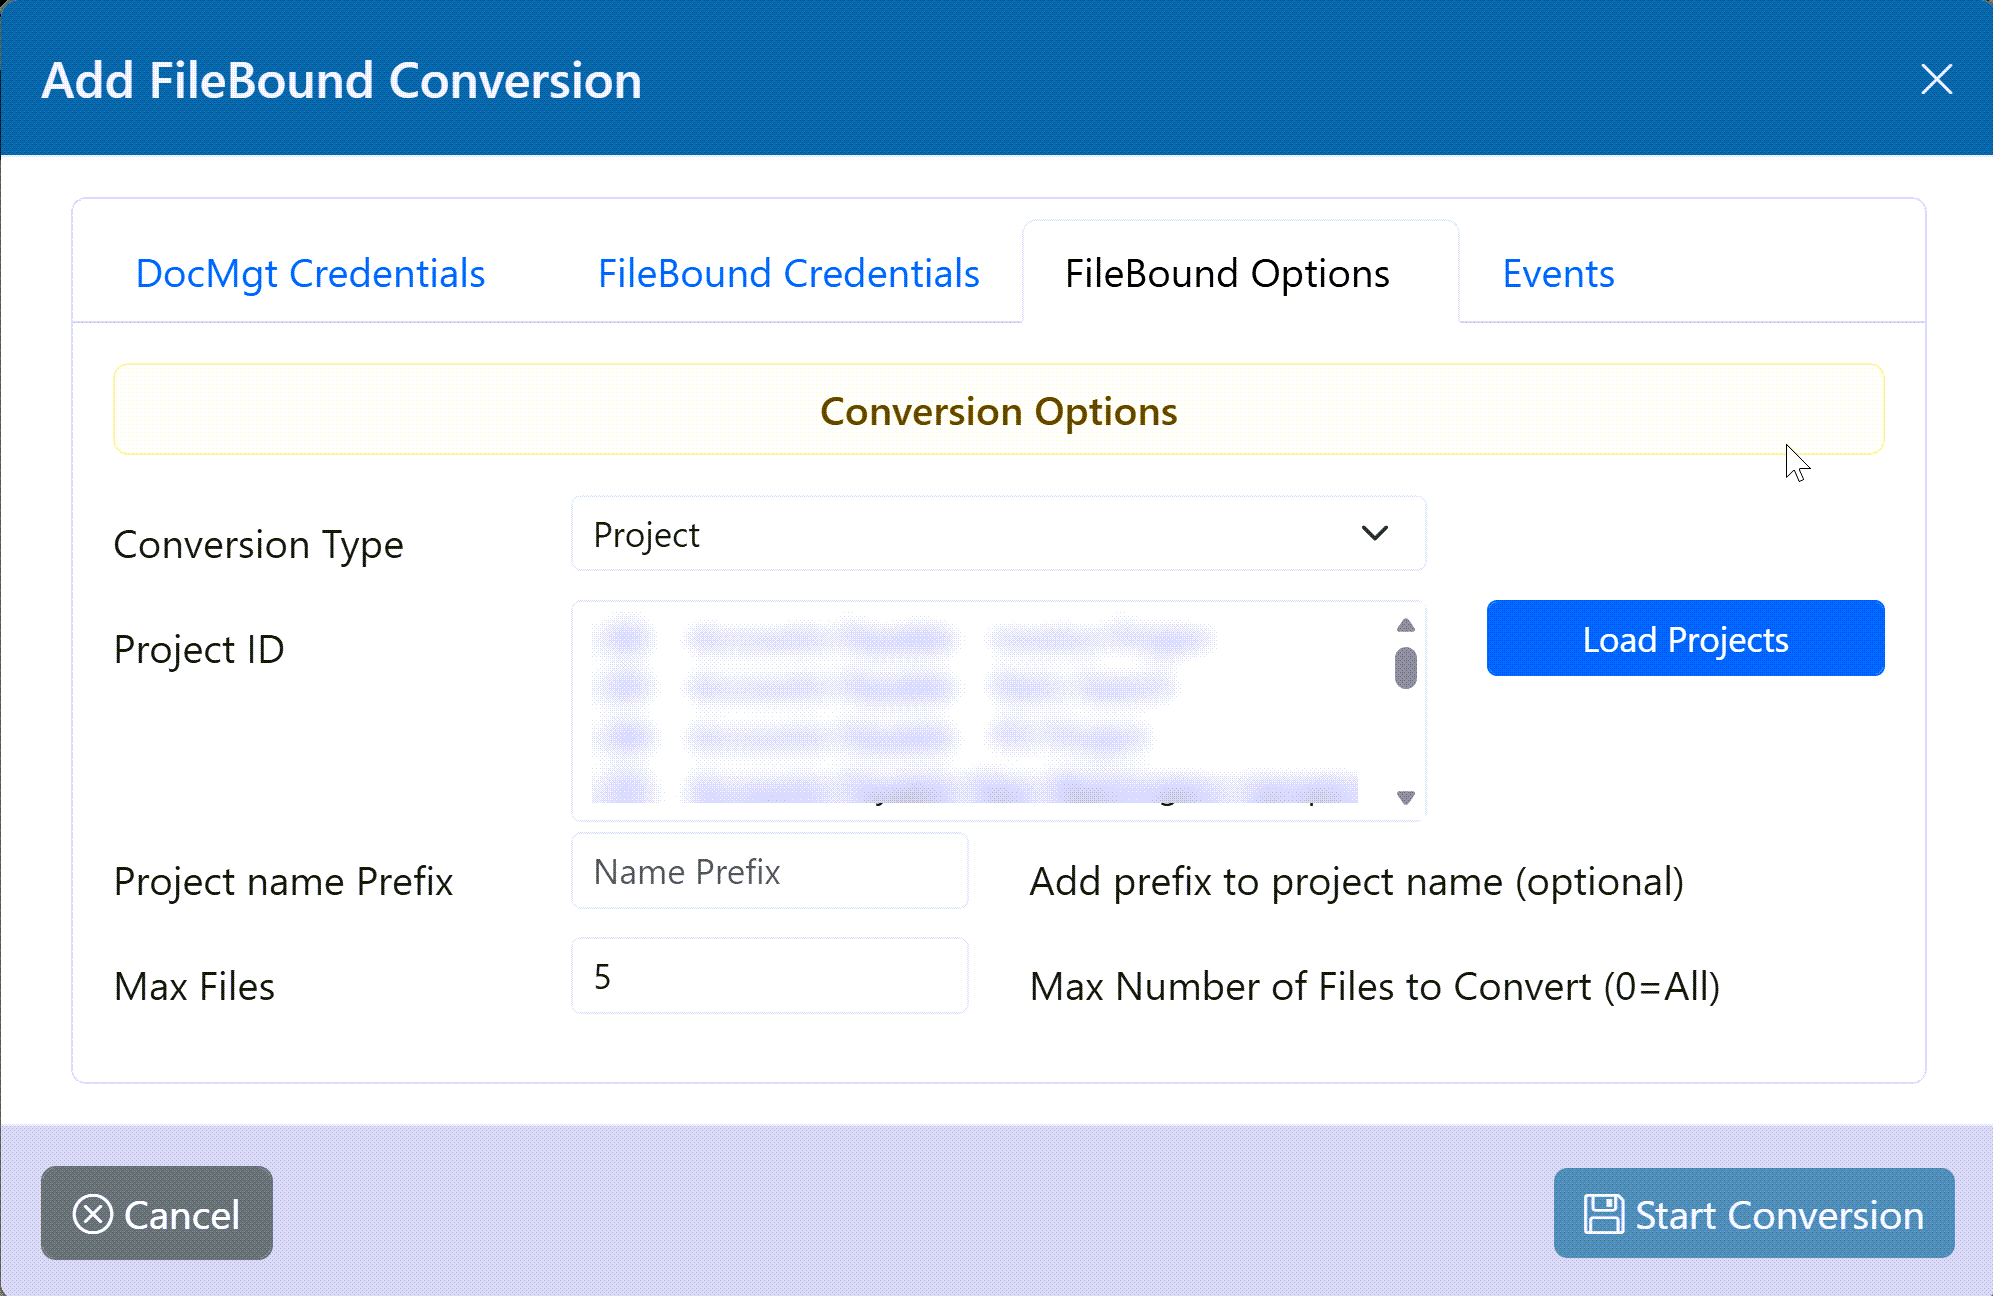
Choose the Conversion Type. Project converts the FileBound projects you select, while Groups and Users brings across FileBound users and groups instead of project content. When the type is Project, click Load Projects to pull the list from FileBound, then select one or more projects (hold CTRL or SHIFT to select several). You can optionally set a Project name Prefix that is added to the front of each converted project's name, and a Max Files value that limits how many files are converted per project — leave Max Files at 0 to convert them all. At least one project is required for a Project-type conversion.
Events
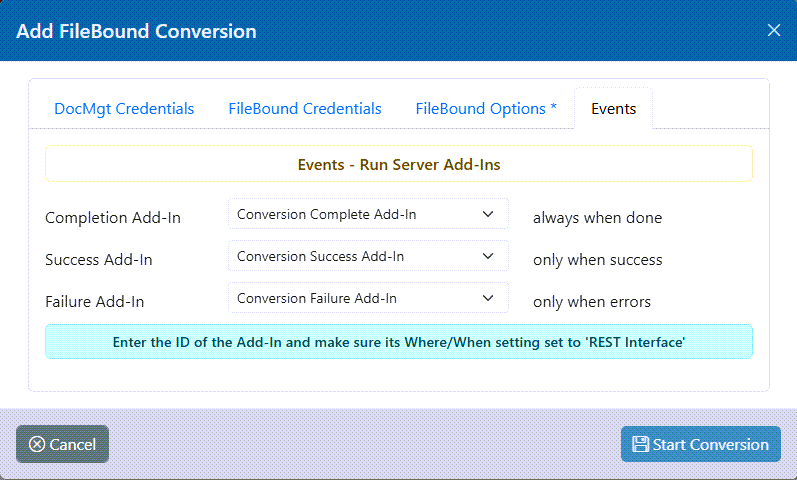
On this tab you can attach server Add-Ins that run automatically when the conversion finishes. Completion Add-In runs at the end every time, Success Add-In runs only when the conversion finished without errors, and Failure Add-In runs only when the conversion ended with errors. Each is optional; leave it on No Add-In to skip it. Only Add-Ins whose Where/When setting is REST Interface appear in these lists, so if the lists are empty you first need to create or reconfigure an Add-In for the REST Interface.
Your FileBound URL and user, DocMgt user, project prefix, max files and Add-In selections are remembered between visits so you do not have to re-enter them for the next conversion. For security the passwords are held only for the current session.
Finding existing conversions
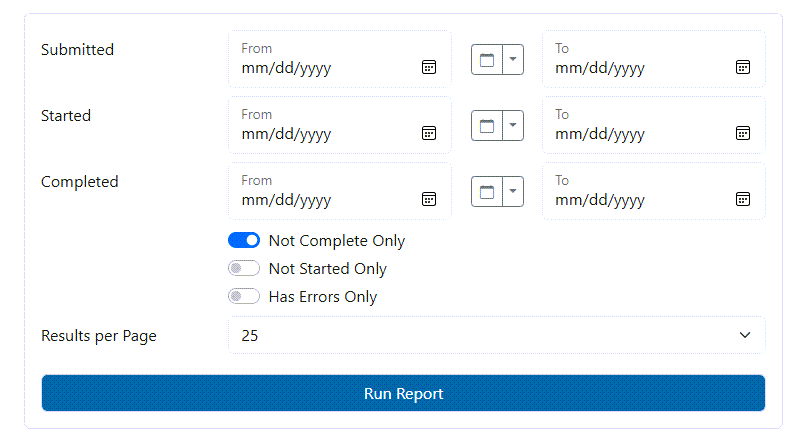
The lower part of the screen is a search form for conversions that already exist. You can filter by the Submitted, Started and Completed date ranges, and narrow the list with the switches: Not Complete Only shows jobs that have not finished, Not Started Only shows jobs still waiting to begin, and Has Errors Only shows jobs that ended with errors. Set Results per Page and click Run Report to search. Use Download to export the current results, and use the save/report controls at the top right to save a set of filters as a named report you can re-run later.
Reading the results grid
Each conversion is shown as a row with these columns.
- Type / Content — the kind of conversion and a short description of what it covers.
- Submitted / Started — when the job was queued and when it actually began running.
- Completed — when the job finished.
- Recs — the number of records converted so far.
- Docs — the number of documents converted so far.
- Status — the current status message describing what the job is doing.
- Progress — a percentage bar showing how far along the job is.
Rows that are actively being processed refresh on their own, and a row briefly highlights when its numbers change so you can see progress at a glance.

Actions on a conversion
The buttons at the end of each row depend on whether the job is still running or has finished.
- Stop (red) — cancels a conversion that is still running. You are asked to confirm first.
- Refresh — pulls the latest status and counts for a running job immediately instead of waiting for the automatic refresh.
- View Log — opens the conversion log for a finished job in a dialog. The log is only available when the job produced one. From the dialog you can Download the log as a text file.
- Reprocess — re-runs a finished conversion. You are asked to confirm first. This is useful when a job failed partway through and you want to run it again after fixing the cause. Using this options will make the conversion pick up where it left off. If you wish to start over completely, start a new conversion.
TIPS
- Always run both Login Test buttons before starting a conversion. Most failed jobs come from a mistyped URL, username or password, and testing first saves a wasted run.
- Use Max Files with a small value for your first conversion of a project. It lets you confirm the content comes across correctly before committing to the full migration.
- Attach a Failure Add-In if you want to be notified (for example by email) whenever a conversion ends with errors, so long-running overnight jobs do not fail silently.
- If a conversion stops with errors, open View Log to see exactly where it stopped, fix the cause, then use Reprocess rather than starting a brand new job.