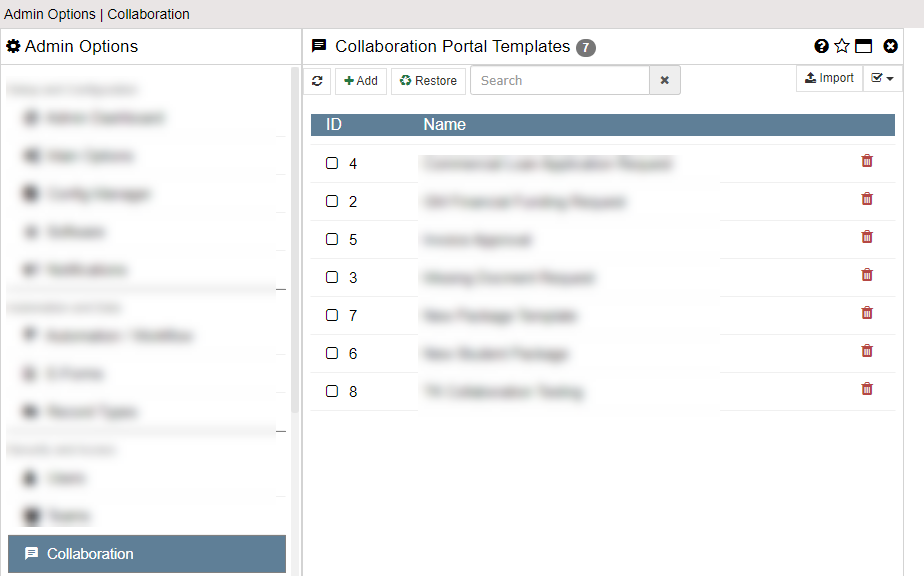
Collaboration
Collaboration Packages are used to share information with and request information from external users. Collaboration Package Templates can be configured to allow users to quickly create a predefined Collaboration Package from within an existing Record and can also be used in Workflow.
NOTE: This section will only show up if the Main Options have the Enable Collaboration Packages option turned ON.
General Settings
Name
The name of his package. This will be used as the default value for the email subject (can be changed) and will also be shown to internal users when they choose a template from which to create a package.
Banner Image
If you want a banner image at the top of the collaboration portal you can enter the full URL here. Leave this blank if you do not wish to use a banner. *IMPORTANT: you need to be sure to use a URL that starts with HTTPS:// and not HTTP://. The URL without the S is not secure. Showing an insecure image on your portal can make your entire portal page not secure!
Instructions
The instructions that you wish to show to the external users. This should be an explanation of what the expectations are of them when using the package. This is a Rich Text field so you can use colors, fonts, etc. You can also use variables in this section.
Email Settings
Emails are used to send notifications to the users that they have a collaboration request. Use this section to design the email they will receive.
From Address
The email address you wish to show as the "from" address. This address will be used if the end user replies to the email.
Email Subject
The subject of the email that is sent to the package users for this package. Click the copy button to copy the package name into the subject.
Email Body
The body of the email that is sent to the package users for this package. Click the copy button to copy the package instructions into the subject. This is a Rich Text field so you can use colors, fonts, etc. You can also use variables in this section.
Shared Documents
Add the documents which you wish to share in this package. Click the PLUS icon to add documents to the list. You can remove a document by clicking its DELETE icon. You can change the document properties by clicking its EDIT icon.
The order in which the documents show up in this list is the order which they are shown to the users. If you want to re-order the documents you can click and drag the ::: handles on the left of the item and drag it up or down.
When editing the document, you have the following options:
Description
The descriptive text to show the end user. This can be an explanation of how to use the document or instructions for them to print it out, etc.
Document Category / Name
The Category and/or Name of the document to share. You don't actually share specific documents from the Record - you share documents by Category/Name. Any document that matches this Category and Name will be shown to the users. If you have more than one document with the given Category / Name in the Record then the users will see them all.
Allow Annotations
By checking this ON you will be allowing the external users to add or change annotations on the document. Be sure this is OK as these annotations will be active on the document when viewed by internal users as well.
Allow Notes
This gives the user a way to add notes to the documents. Those notes will be filed as a standard Document Note.
Allow Download
By checking this ON you will be allowing the external users to download the documents. This can be handy if the document is not viewable in the system or if the purpose of the collaboration is to send them copies of documents.
Required Documents
Add the documents which are required to fulfill this package. Click the PLUS icon to add documents to the list. You can remove a document by clicking its DELETE icon. You can change the document properties by clicking its EDIT icon.
The OPTIONS icon is used to set dependencies. Dependencies ensure that documents are only required if a specific form has already been submitted. For instance, if a user submits a request form for payroll information you may then want to have them upload a copy of their driver's license as proof that they should have access to the payroll information. If they never submit that request then you would not require them to upload the driver's license.
The order in which the documents show up in this list is the order which they are shown to the users. If you want to re-order the documents you can click and drag the ::: handles on the left of the item and drag it up or down.
When editing the document, you have the following options:
Description
The descriptive text to show the end user. This can be an explanation of how this document will be used or anything you wish to relay to them.
Document Category
The Category of the document to require. The document that the user uploads for this required document will be placed in this Category.
Document Name
The Name of the document to require. The document that the user uploads for this required document will be named this name. If they upload multiple then all will have the same name.
Allow Change After Save
If this setting is ON then the user can change their documents after they have initially submitted them. With this OFF user does not have the ability to submit it again later.
Allow Notes
This gives the user a way to add notes to the documents. Those notes will be filed as a standard Document Note with the uploaded document.
Required E-Forms
Add the e-forms that are required to fulfill this package. Select from the list of e-forms on the left by clicking the forms you want to require. The list on the right can be arranged in any order by dragging and dropping the list items. You can remove an e-form from the required list by clicking its DELETE icon.
You can also toggle on whether or not the user can make changes to the form after it is submitted. If that is turned ON then the user can come back to the collaboration portal any time before it is closed and make changes to the e-form data. Otherwise the e-form does not show up in their list.
The forms can also be set to ONLY be shown if specific other forms have been completed. This can be used to ensure that forms are filled out in the proper order. Forms can also be shown or hidden based on Record data values. For instance, you can show the credit card form only if the Record has a "CHARGE" variable set to "YES" or something similar.
Please note that only Public e-forms are shown in this list.
Record Types
A collaboration package can be associated with any of the Record Types in the list on the left. When the template is associated with a Record Type it becomes an optional package type for Records of that type. Select from the list of record types on the left by clicking the record type you want to associate. You can remove the association by clicking its DELETE icon.
Events
Starting in Version 3.43 we have added events around the portals where you can run actions when certain events happen. We currently have 3 events that fire - Login, Document Upload, E-form Save.
Login
When a user logs into a portal that is configured with this event then that sequence of events is executed. The following variables are available for use in workflow:
- LastPortalName - The descriptive name of the portal
- LastPortalID - The ID of the portal
- LastPortalGUID - The unique GUID of the portal
- LastPortalLogin - The email address of the person who logged in
- LastPortalLoginTime - The date/time of the login
- LastPortalLoginTimeUTC - The UTC date/time of the login
Document Upload
When a user uploads a document into a portal that is configured with this event then that sequence of events is executed. The following variables are available for use in workflow:
- LastPortalName - The descriptive name of the portal
- LastPortalID - The ID of the portal
- LastPortalGUID - The unique GUID of the portal
- LastPortalDocumentCat - Category of the uploaded document
- LastPortalDocumentSubCat - SubCategory of the uploaded document
- LastPortalDocumentName - Name of the uploaded document
- LastPortalDocumentID - ID of the uploaded document
- LastPortalDocumentTime - The date/time of the upload
- LastPortalDocumentTimeUTC - The UTC date/time of the upload
E-form Save
When a user saves an E-form into a portal that is configured with this event then that sequence of events is executed. The following variables are available for use in workflow:
- LastPortalName - The descriptive name of the portal
- LastPortalID - The ID of the portal
- LastPortalGUID - The unique GUID of the portal
- LastPortalEform - The name of the E-form that was saved
- LastPortalEformID - The ID of the E-form that was saved
- LastPortalEformCat - Category of the uploaded document
- LastPortalEformSubCat - SubCategory of the uploaded document
- LastPortalEformName - Name of the uploaded document
- LastPortalEformTime - The date/time of the save
- LastPortalEformTimeUTC - The UTC date/time of the save
Buttons in Instructions
Starting in Version 4.10 we have added the ability to code buttons into your Instructions and Instructions Complete screens. There are only a couple of things the buttons can do at this time but the list of action types may grow in later versions.
The basic syntax to the button code is this:
{BTN(showwhen|title|action|value)}
showwhen - When to show the button. Available options:
0 = Always Show
1 = Show if portal NOT complete
2 = Show if portal IS complete
title - The text to put in the button
action - The action to take when the button is clicked. Available options:
eform = Open an E-form
url = Open a browser tab to a web URL
value - The value that needs to be used for the button to complete it's actions
For eform actions, this is a numeric value:
>0 = the ID of the E-form to open
-1 = open the next form that has not been completed
-2 = open the first form from the e-form list
for url actions, this is the URL to open