Backup Action
Properly Configuring Backup Actions
Backup happens in 2 steps - (1) Queue up the Record for backup and (2) Backing up the Records. Step 1 is handled by the Retention engine. Step 2, however, requires the proper configuration and use of Exporter Service to run. These are the steps to make the Exporter service work in the Backup sequence.
Install Exporter
The first thing you will need to do is install Exporter on a machine that will be configured to run the Backup routine on a scheduled basis. This machine will need to be running all the time to be able to export the data properly. If you have Exporter already installed make sure it is updated to the latest version.
Create a Folder for Backups
Select a folder on that machine where you want the backed up Records to go. This folder will contain all the Records and Documents that are backed up.
Configure Exporter
Right click on the folder you just created and select docMgt Export / Configure Export. This will bring up the Exporter interface. Enter the URL for your server, a username and password for the user who will do the backups. BE SURE to create a new, special user just for backups. This will avoid backing up Records that are not part of the Retention process. Exporter will download any Record assigned to the user you enter here so if you use a user that is involved in other workflows Exporter will download those Records as well as the ones you want to back up.
Add the Retention Backup Add-In
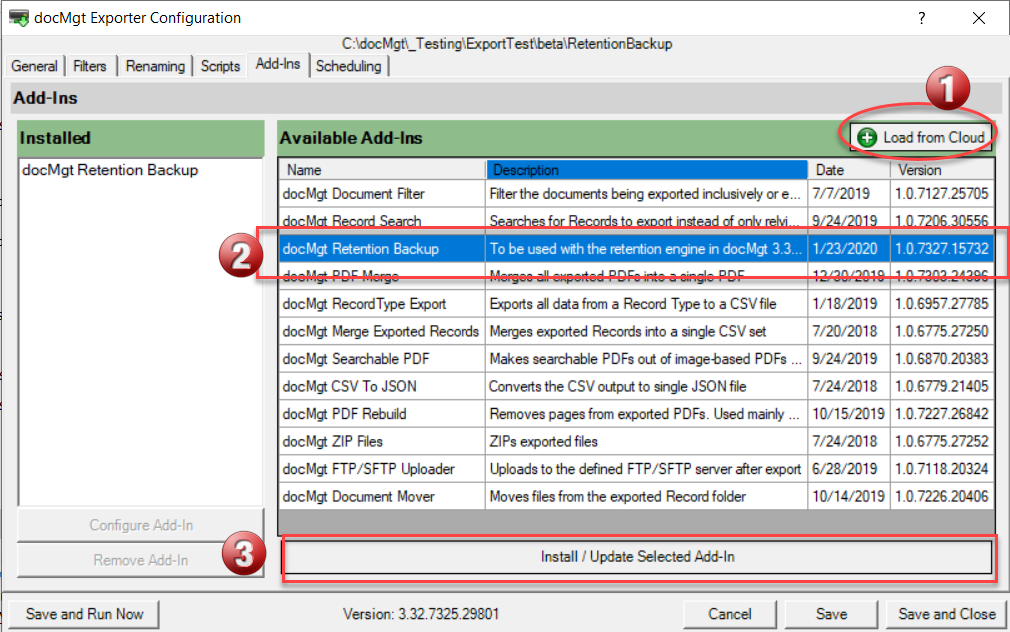
Go to the Add-Ins tab in Exporter to install the Add-In.
- Click the Load from Cloud button
- Select the docMgt Retention Backup add-in in the list
- Click the Install / Update Selected Add-In button
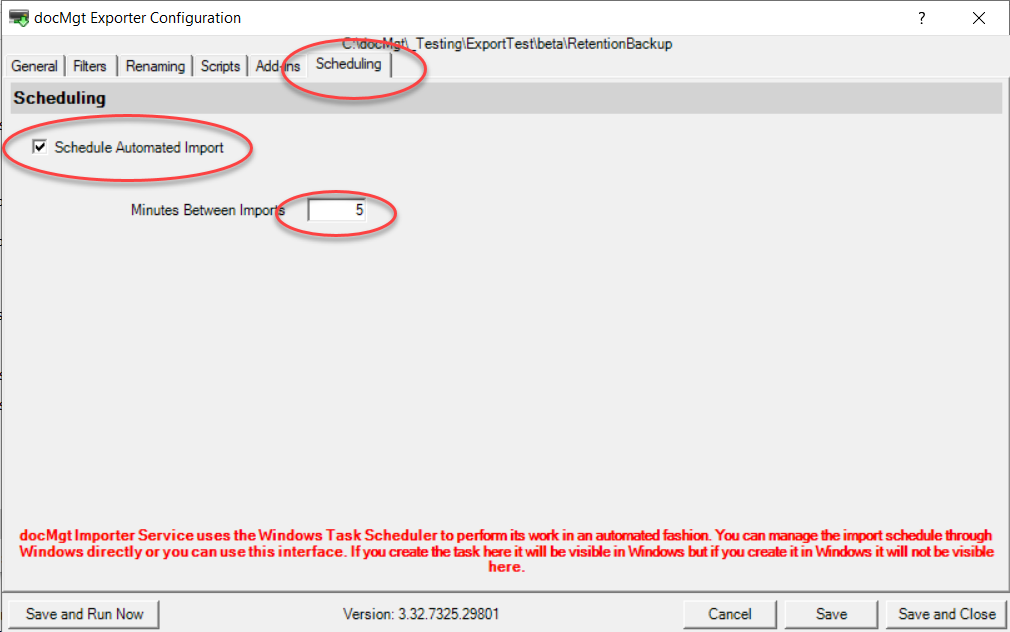
Schedule the Process
If you wish to run the backup regularly then you will want to schedule the process. Go to the scheduling tab and turn ON the check box. Then select the number of minutes between process. You may wish to NOT schedule during testing and only turn this on after you have tested and make sure your process is how you want it.
Next Steps
If you plan on using workflow to work with the Retention system you will need to know about the action values that are being used behind the scenes. The following variables are being set on each Record during Retention processing.
|
Backup Queue |
@BackupQueueDate |
This is set to the date/time that the Record has been queued up for backup |
|
Backup Done |
@BackupDoneDate |
This is set to the date/time that the Record was actually backed up to a local drive |
|
Route |
@RouteDate |
This is set to the date/time that the Record was routed by the Retention engine |
|
Delete |
@DeleteDate |
This is set to the date/time that the Record was deleted by the Retention engine |
|
Purge |
@PurgeDate |
This is set to the date/time that the Record was purged by the Retention engine (not available after purge process though) |
|
Route |
@RouteDate |
This is set to the date/time that the Record was routed by the Retention engine |
|
Run Action Set |
@ActionDate |
This is set to the date/time that the Action Set was run against the Record by the Retention engine |
You can look for these variables within workflow to decide to act upon these Records. This is useful especially to get approvals for Record deletion. Set up a workflow that watches for Records (probably by Record Type) that have @BackupDoneDate not empty (!#) and CanDelete = blank (#). We will use the CanDelete later in Retention. Then give that trigger 2 buttons CanDelet = YES and CanDelete = NO. Then in the REtention for the Record Type add a Delete action that runs 0 days after Backup Done but is filtered to only act on those Records where CanDelete = YES. This way a user has to approve the record deletion before it gets automatically deleted.