Login Screen
You can customize the look and feel of the login screen by changing its colors and images. The login branding is broken up into 3 sections – Screen, Left and Right.
Screen
This allows you to set the basic properties of the outside of the screen.
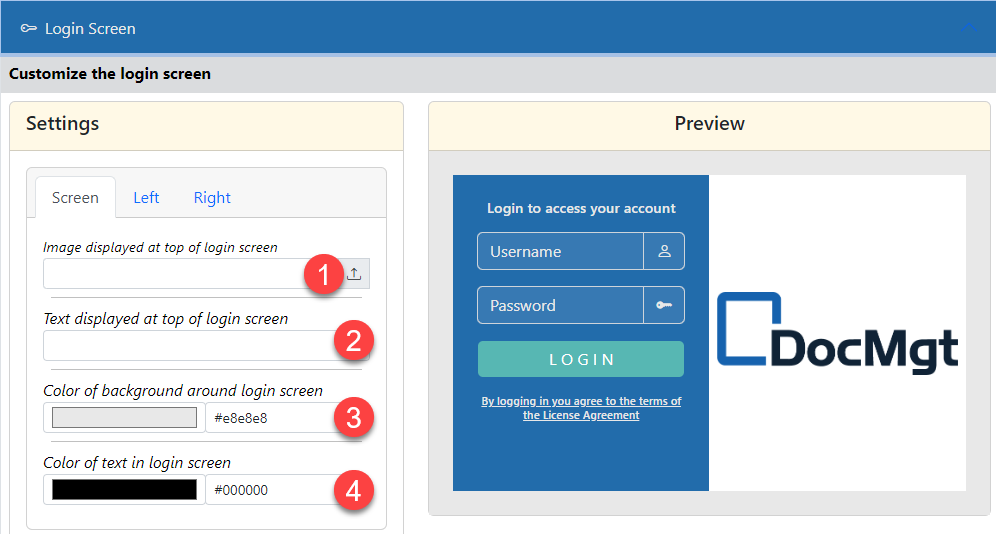
- Image displayed at top – You can display an image above the login box. It will be centered in the screen and will be shown just above the login box. You can upload an image or use a URL from another public site. It must be publicly available for it to be shown properly. If you leave this setting blank, then no image will be shown.
- Test displayed at top – You can display a text message above the login box. It will be centered in the screen and will be shown just above the login box and below the top image (if any). If you leave this setting blank, then no text will be shown.
- Background Color – This is the background color of the entire screen outside of the login box. You can enter a value manually using the entry box on the right. Or you can select a color by clicking on the color box on the left. If you enter the value manually, you must make sure the value is a proper Web/CSS color code. For instance, #000000 is blank where #FF0000 is red. There are plenty of Web/CSS color code references on the Internet if you need one.
- Text Color – This is the color of the text outside of the login box. You can enter a value manually using the entry box on the right. Or you can select a color by clicking on the color box on the left. If you enter the value manually, you must make sure the value is a proper Web/CSS color code.
Left
This allows you to set the properties for the left side of the login screen
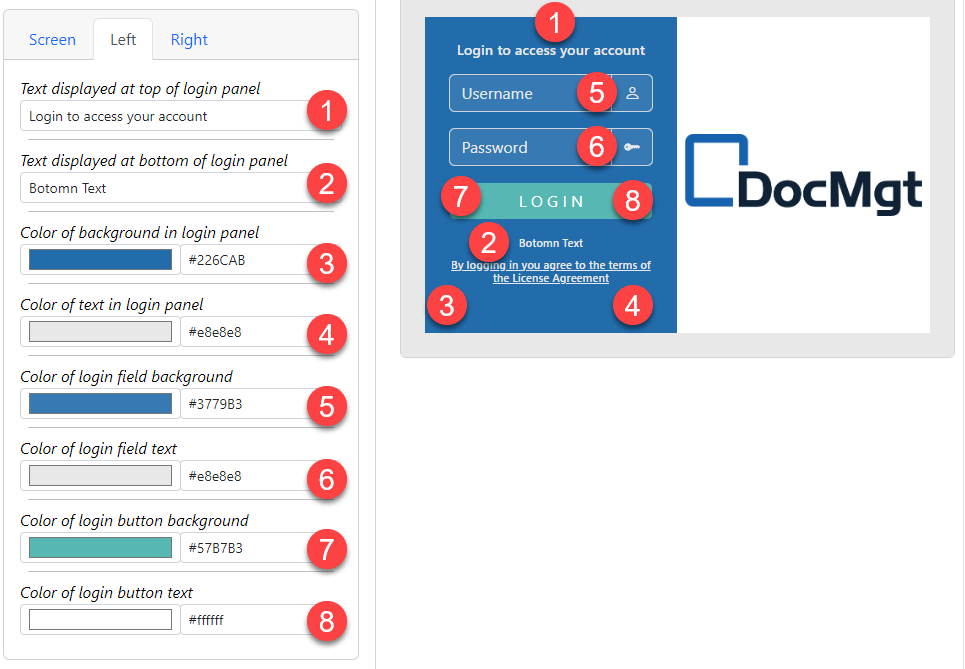
- The text to show above the username / password fields. This is useful for basic instruction but keep them short to make sure the screen does not wrap strangely.
- The text to show below the username / password fields. This text will show up between the login button and the license text. Keep them short to make sure the screen does not wrap strangely.
- The background color for the left side of the screen.
- The text color for the left side of the screen.
- The background color of the Login and Password fields. Make sure this has a nice contrast with the text color property.
- The text color of the Login and Password fields. Make sure this has a nice contrast with the background color property.
- The background color of the Login button. Make sure this has a nice contrast with the text color property.
- The text color of the Login button. Make sure this has a nice contrast with the background color property.
Right
This allows you to set the properties for the right side of the login screen.

- The image to use for the background of the right side. This is normally the customer’s logo or banner graphic. You can upload an image or use a URL from another public site. It must be publicly available for it to be shown properly. If you leave this setting blank, then no image will be shown.
- The opacity of the image. Opacity dictates how “see through” the image is. If you are going to add text on top of the image, then it is sometimes wise to set the opacity low to make it more transparent. Or you can set it high to use the image as the background color for the text.
- The background color of the panel. This color will show on the sides of the image so you can either complement the image or try to set it to the same color as the image border. Make sure this has a nice contrast with the text color property.
- The text color of the panel button. Make sure this has a nice contrast with the background color property.
- The first line of text. There are 3 “normal” text lines and one “link” text line. The upper lines are larger and the lower are smaller. Any left blank will not show anything.
- The second line of text
- The third line of text
- The text used for the link (if any)
- The URL of the link. This is useful to have links to other systems or to a “help” section, etc.