Share via Portal
If Collaboration has been enabled for your site, you will have this option available. This option allows you to share records with outside users.
The typical use for this feature is sharing Records with external auditors. You can search up the records they wish to see and share them via a portal.
When you click this option you are presented with a dialog to enter some pertinent data. Once that dialog is filled out the portal will be created and a link will be sent to the email address(es) you specified in the dialog. When the user clicks the link they will need to log into their portal using their email address (must be one of the addresses entered into the portal dialog) and the password that was assigned.
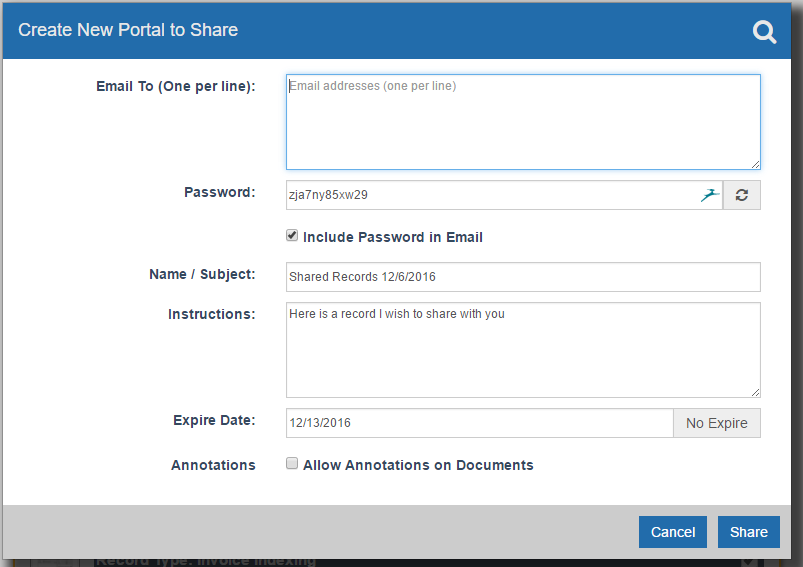
Email To: The email addresses to which to send this portal. Enter one email address per line.
Password: This is the password that is required to log into the portal. You can accept the default random password or you can enter your own. You can even generate a new random password by clicking the button to the right.
Include Password: If you want to include the password in the email make sure this is checked. This could be a potential security risk however so you may wish to NOT show it in the email and either send the users another email with the password, text it to them, chat it to them or get it to them in some other fashion.
Name / Subject: This is the subject of the email that is sent to the users. It is also the name of the portal as it shows up in your portal list.
Instructions: This is the information that will be shown to the users who log into the portal. Place information here that will help them understand what they are looking at or what they are to do with the information.
Expire Date: The date after which this portal is no longer valid. Enter a date to have the portal automatically turned off at a certain date. Click the "No Expire" button to ensure the portal does not automatically turn off.
Annotations: Whether or not to allow external users to annotate the Documents in the Records. Check it ON to allow annotations and OFF to NOT allow.
Add to an Existing Portal
If you wish to add the selected Records to an existing portal, click the Search ![]() icon on the top of the dialog. From the list shown select the portal to which you wish to add the records.
icon on the top of the dialog. From the list shown select the portal to which you wish to add the records.

Remove Records from an Existing Portal
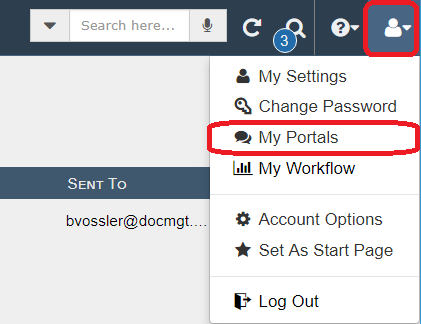
If you wish to remove some Records from an existing portal, click the "My Account" ![]() icon on the top right of the tool bar then choose the "My Portals"
icon on the top right of the tool bar then choose the "My Portals" ![]() option from the drop down menu. From here you can copy the URL, view the portal, search up the shared Records, edit or delete the portal. To remove Records, select Edit then remove the selected Records from the list on the bottom of the edit dialog.
option from the drop down menu. From here you can copy the URL, view the portal, search up the shared Records, edit or delete the portal. To remove Records, select Edit then remove the selected Records from the list on the bottom of the edit dialog.
External Users
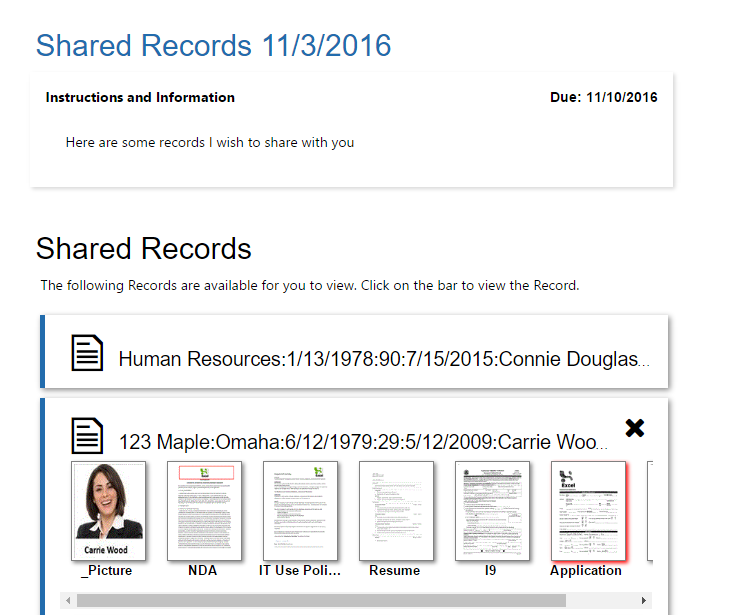
When the users click on the link and log into the portal they will see a list of the records you have shared with them. They can click on the Record to view the contained Documents then can click on the individual Document to view it.
* On-Line Article about Sharing Via Portal