AddIns

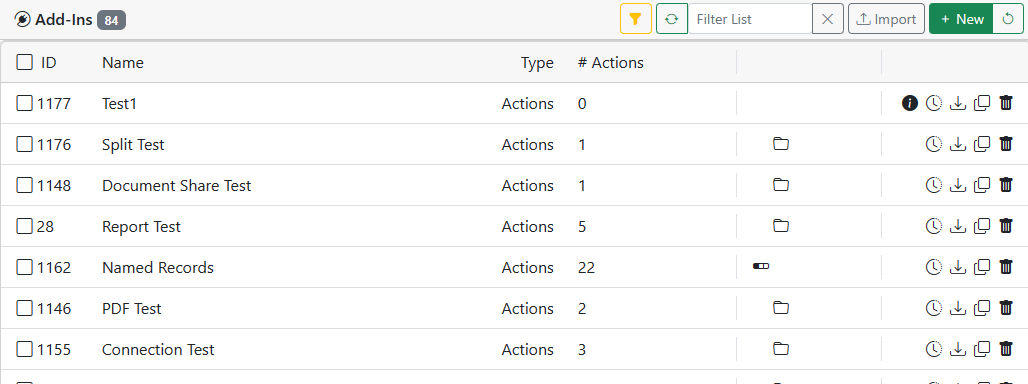
Add-Ins are used to extend the base functionality of AddIns. You can add buttons at strategic locations in the interface that allow your users to open other web pages or even perform full program actions.
Add-Ins can be as simple as a web page link to take the user to another application or as complex as a DLL written specifically to perform a business function.
General Settings

Name / Icon
The name and icon that will be shown on all the Add-In buttons for this Add-In.
BG Color / Text Color
The color of the button and its text.
Description
This is only shown here for your notes
Type
This is where you specify the type of Add-In you wish to use. The other questions that appear will depend on the option you select here.
Web URL
If you specified any URL-based types this this is where you can put the URL value. You can use variables like [RecordID], [DocumentID], etc. to be able to send those IDs to the URL you are calling.
Target Window
The name of the window to use for showing the URL. Use _self for the current window, _blank for a new window or a name for a named window.
Web Target
The name of the window to use for showing the URL.
E-form (Record screen only)
The E-form to start in the current Record
Where/When to Show Settings

Where to Show
Where to show the button(s) for this Add-In inside the DocMgt interface.
Top Toolbar List - This will show the button(s) on the toolbar. If only Add-In is set to display here then that will be the button that shows. If more than one are to display then a drop-down menu of available Add-Ins is shown.
Show Add-In in Lower Toolbar - This will show the Add-In button in the lower toolbar section. They will be just to the left of the Last Search button. These Add-In buttons are shown as ICON ONLY buttons to save space.
Toolbar Admin Panel - This will show the Add-In in the Admin panel. This is usually reserved for actions that are Administrative in nature. The option will only be visible to admin users.
Toolbar Reporting Panel - This will show the Add-In in the Reporting panel. This is usually reserved for actions that are Reporting in nature. The option will only be visible to reporting users.
Record Add-In List - This will show the button(s) on the Record screen in the Add-Ins panel.
Show in Main Record Screen - This will show the Add-In button at the top of the Record screen. It will also be available in the Add-Ins panel.
Show as Record Banner - This will show the Add-In as a bar that goes across the top of the Record screen. You can then customize the banner text and colors.
Add-In Will Have Opened / Checked Documents Available - If this options is OFF, then the Add-In will have the OPEN Documents available as the Active Document. If the option is ON, then the Add-In will have the CHECKED Documents available to it. In the latter case, the actions in the Add-In will run once per Document.
Add-In Will/Will Not refresh the Record/Viewer screen after running - Use this option to control whether the Record reloads after the Add-In runs. If only opening an E-form with the Add-In then there is no need to refresh. If you are changing data values then a refresh is a good idea.
Search Add-In List - This will show Add-In in the search results page. The Add-In actions performed upon all checked Records OR on all searched Records if none selected.
Show in Main Screen - This will show the Add-In button at the top of the Search Results screen. It will also be available in the Add-Ins panel.
AddIn Pre-Process and Post-Process actions will/will NOT be sent Record IDs - If this options is OFF, then the Add-In's Pre-Process and Post-Process actions will NOT have access to the IDs of the Records that were found int he search. If is it ON then the IDs Records that were found in the search WILL be available to the Add-In's Pre-Process and Post-Process actions via the @RECORDIDS variable. The IDs will be a string with ; (semi-colon) as a delimiter.
RESTS Interface (API Calls) - This will allow the Add-In to be called via a REST API call.
Record Types
If you selected Record or Document above then you can specify the Record Types for which this Add-In is valid. If the user is in a Record for that Record type then this Add-In will be available.
Work Triggers
If you selected Record or Document above then you can specify the Workflow Triggers for which this Add-In is valid. If the user is in a Record and that Record is shown in the context or a Workflow Trigger and that Trigger is one you selected then this Add-In will be available.
When to Show
After the above options are evaluated and the Add-In passes those tests, you can also add in more visibility tests to give you greater control over when the Add-In is seen. For instance, you can specify to show the Add-In only when the current Record has a field named "City" that is not blank. Or you could have this Add-In only show when the "Age" field is greater than 50.
These activation rules are very similar to Workflow Activation Rules but are not dependent on having Workflow enabled.
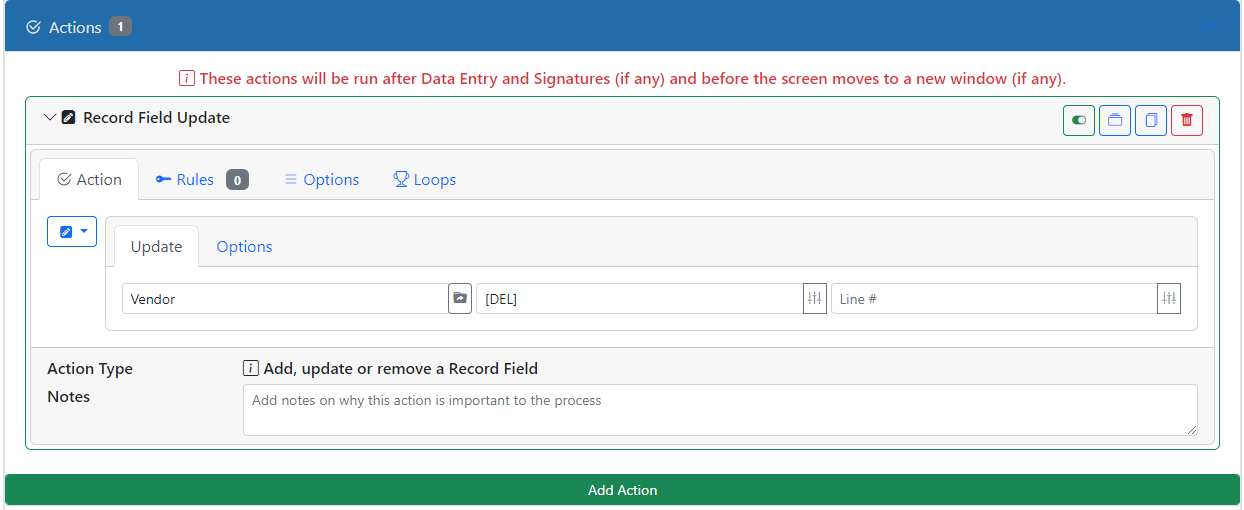
Actions
Actions allow your Add-In to perform certain actions from the server side before triggering any other interface. For instance, your you might have the add-in update a Record variable before calling your custom add-in screen. You could also add notes and trigger workflow from your add-in button click.

Pre-Process and Post-Process Actions
When using an Add-In from the Search screen, the Add-In can run a set of actions BEFORE and AFTER the actual Records are run. This allows you to set up the environment then run the Records then reset things or finish the process after all Records.
These actions are very similar to Workflow Actions but are not dependent on having Workflow enabled.
Pre-Process and Post-Process Viewer Actions (Enterprise Only)
Viewer actions are commands you can send directly to the viewer in Record Add-Ins only. You can choose to run them before or after the server actions so you can better control the viewer experience.
NOTE: Post-Process Viewer Actions will only run when the Add-In is set to NOT refresh the screen when done.
Supported Actions:
Open/Close Edit Screen - Opens or Closes the record Edit screen for the user. This is typically one of the last actions called if doing multiple actions.
Start New E-form - This is very similar to using the Add-In Type of E-form. It will open a new E-form as if the users selected the form from the forms library.
Open Document by Name - This will find a document matching your settings and open it.
Open Document by ID / Page - This will find a specific document by ID and open it to the specified page.
Document Full Screen / Not Full Screen - Shows the current Document in full screen mode or normal mode
Open Required Documents - This opens the "Required Documents" panel so users can manage their required document list.
Open Clipboard Panel- This opens the "Document Clipboard panel
Print Document / Checked Documents - This will print the current Document or the checked Documents
Download Document / Checked Documents - This will download the current Document or the checked Documents
Email Document / Checked Documents - This will start the Email process with the current Document or the checked Documents
Add Document / Checked Documents to Clipboard - This will add the current Document or the checked Documents to the Document Clipboard
Check / Uncheck Documents - This will add the check or uncheck the current or checked Documents in the Document list
Scan Documents - This will open the scanning utility, allowing you to specify the Category, Subcategory and Name of the document they are scanning. This will only work on Windows computers that use Edge or have Chrome or Firefox with the Click Once extension installed.
Rearrange Pages - This will open the "Rearange Pages" panel for the current Document
Split Documents - This will open the "Split Documents" panel in the current Record
Classify Documents - This will open the "Classify Documents" panel in the current Record
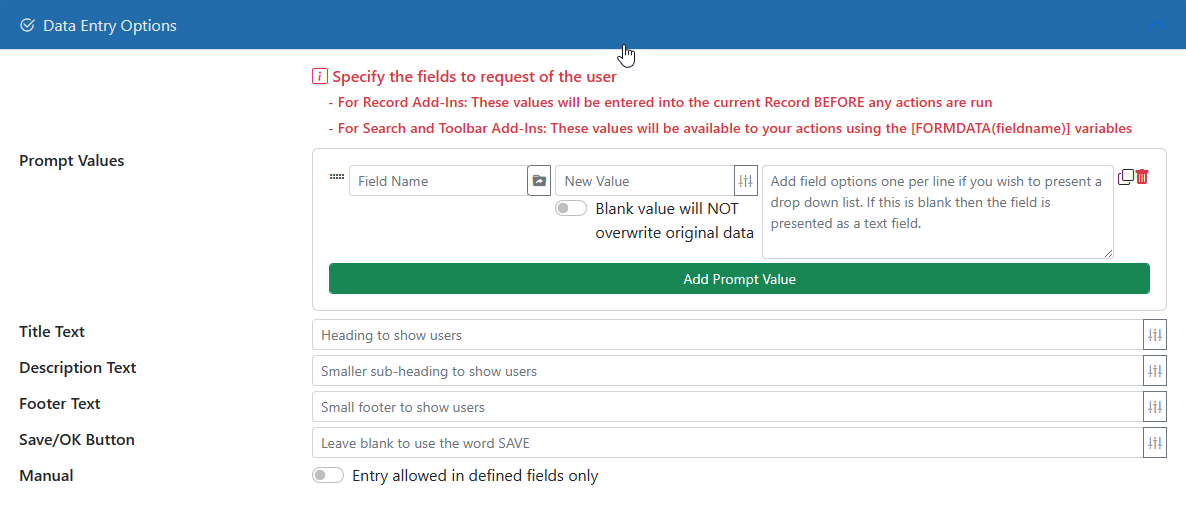
Simple Data Entry
You can prompt a user to enter or validate data when the Add-In is activated. This is a great way to have them confirm data amounts or select a user to send something to.

E-form Data Entry
You can prompt a user to enter information via an E-form. This will bring up a modal window with your chosen E-form for them to enter data into.

Depending on from where you are calling the Add-In, the way it works is slightly different.
Record Add-In
If you are calling the Add-In from a Record screen or from a Toolbar which has access to the current Record, the E-form works as if it were normally brought up in the Record screen. All the data is loaded from and saved to the current Record. This means all "Save to Record" will save into the Record as part of the E-form save process like normal. Any document uploads will save into the same Record.
Your Add-In can access the data from the E-form by using normal [FieldName] syntax because it was saved into the Record. If you did not mark a field as "Save to Record" then you will need to use alternative methods to get to the data from the E-form document.
Search / Toolbar Add-In
If you are calling the Add-In from a Search screen or from a Toolbar which does not has access to the current Record, the E-form works differently. There is no Record in memory for the E-form to load its data from so the fields cannot auto-fill normally. Likewise, when the E-form is saved it does not save into the Record. It saves into a temporary FormData array. The E-form also cannot save Documents (i.e. canno use File Upload fields) since it has no Record to save into. You can get around this in various ways but only if you have a Record you can work with somewhere.
Your Add-In can access the data from the E-form by using [FORMDATA(FieldName)] syntax. All fields are used this way regardless of their "Save to Record" setting. Keep in mind that only basic fields are compatible with this method. Any field that has a Value will only save the Value and nothing else. For instance, tables will only have their Total value available (i.e. the footer of last column). If you wish to save the entire table then you will need to extract the table data into another text or hidden field using the {table|data} syntax.
Confirmation Prompt
You can confirm a user's actions by using the Confirmation Prompt.

Request Signature
You can pop up a signature field that asks for the current user to sign off on the action. This signature is saved into the Record(s) being run against in a field you designate.
